Development Environments [2]: Ubuntu 20.04 Settings on RTX 4080 -2
Prerequisites
4. Install cuda 11.3
1) Download CUDA Toolkit 11.3
NVIDIA DEVELOPER - CUDA Toolkit Archive
Go to website above in order to install cuda 11.3.
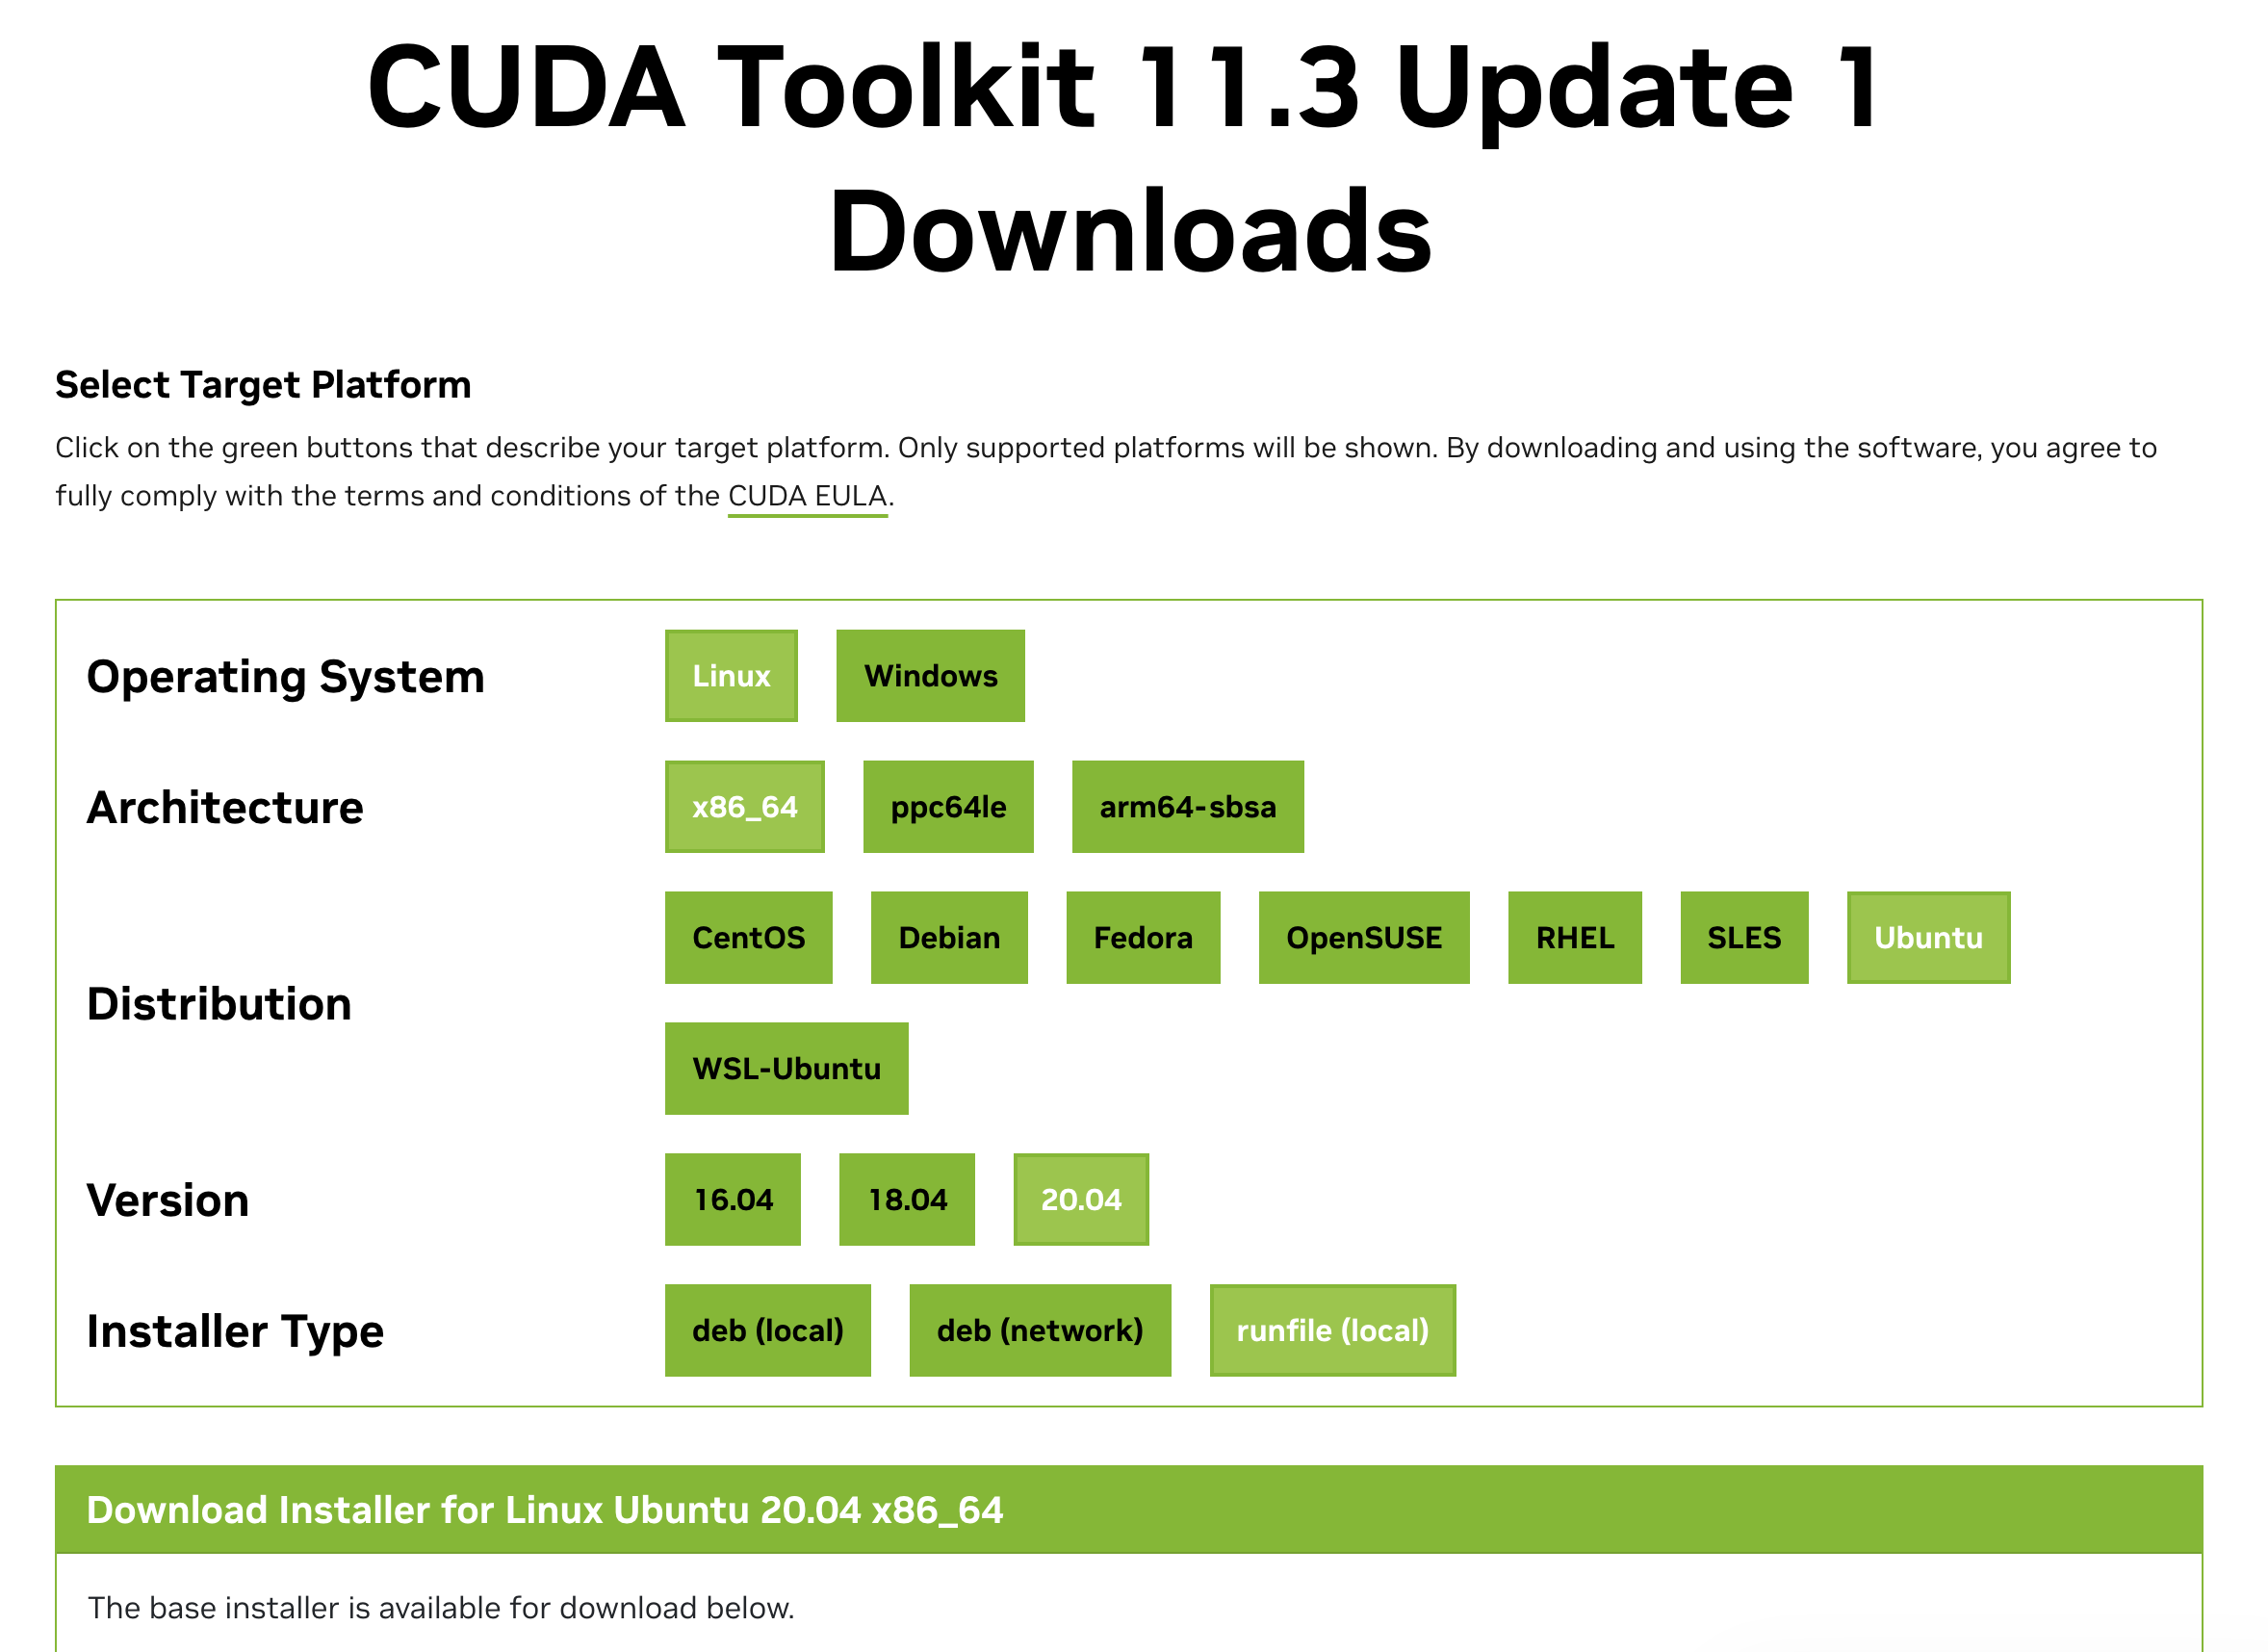 Select target platform
CUDA Toolkit 11.3.1 > Operating System ‘Linux’ > Architecture ‘x86_64’ > Distribution ‘Ubuntu’ > Version ‘20.04’ > Installer Type ‘runfile(local)’ > Follow the instruction
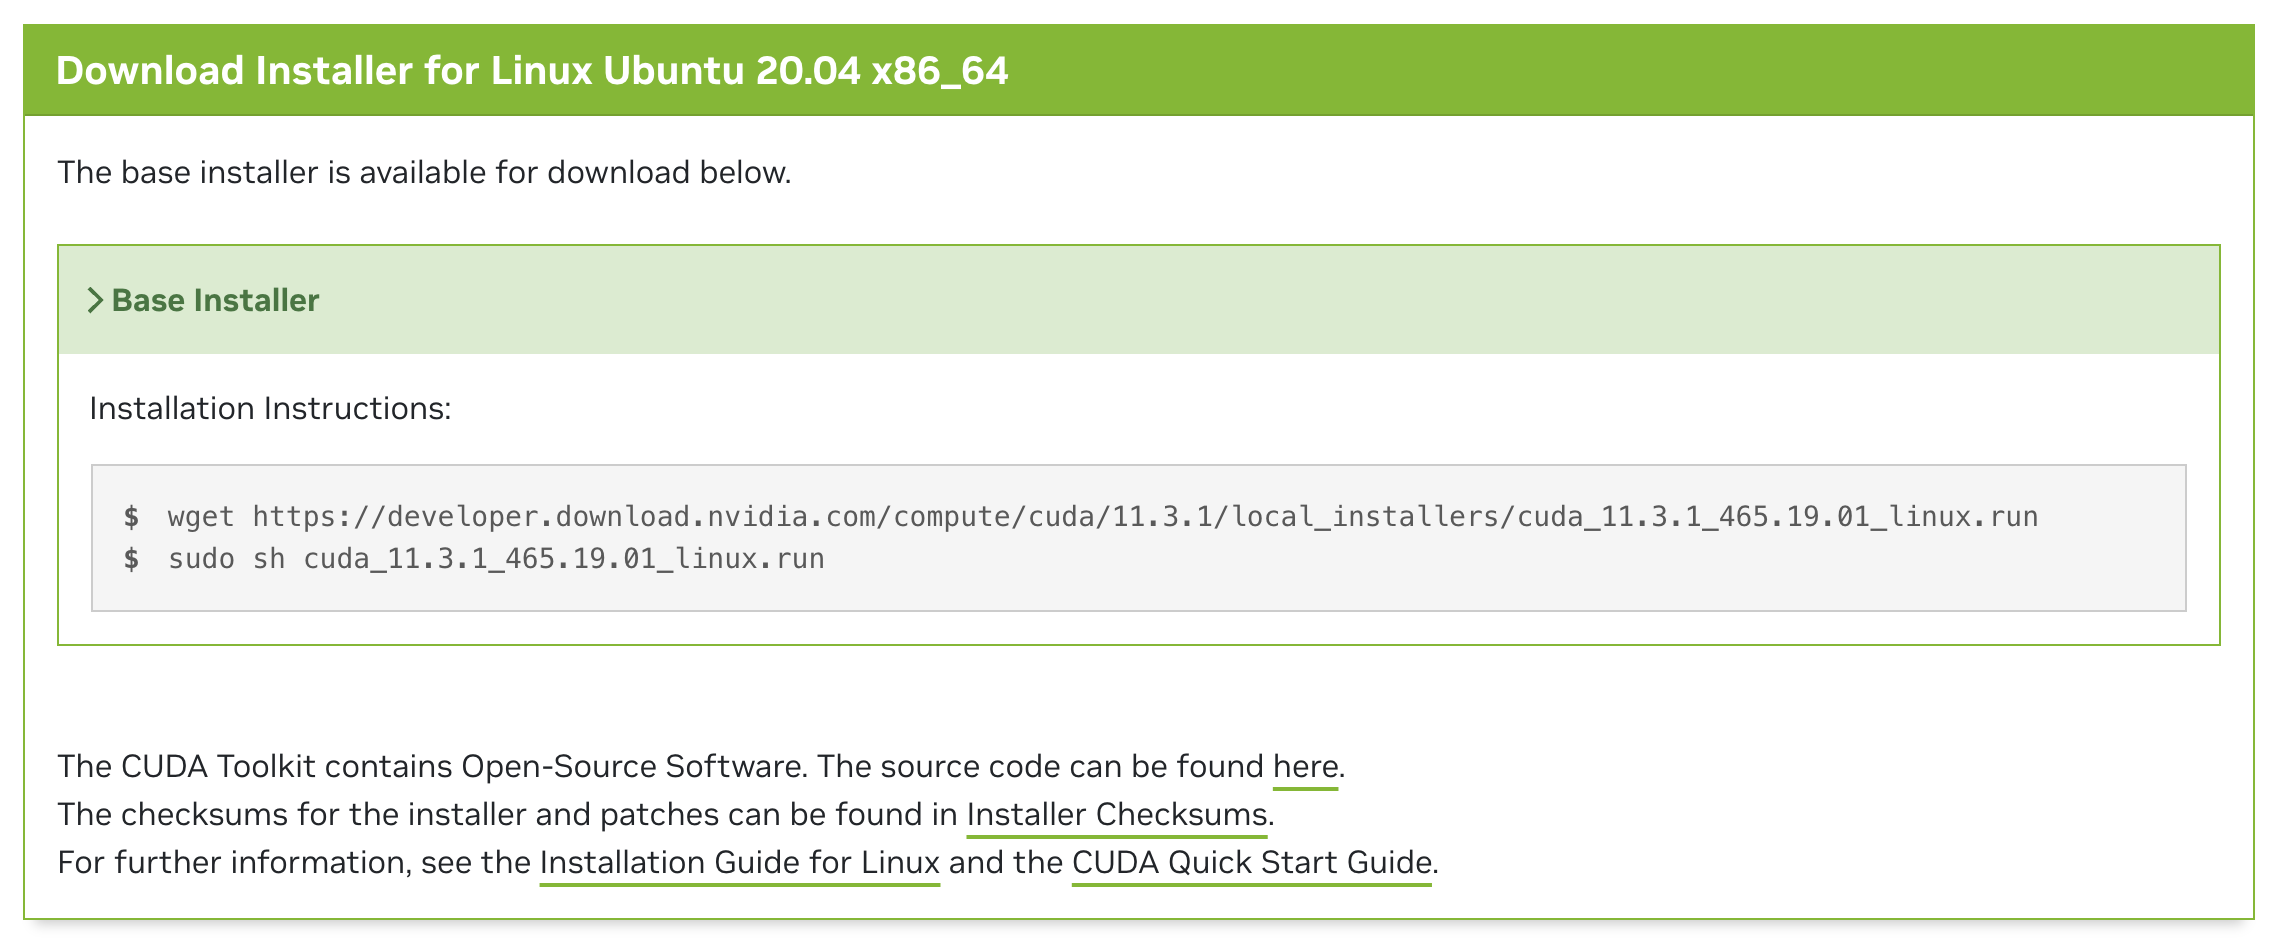 Instructions for the installation
1
2
3
# runfile(local)
wget https://developer.download.nvidia.com/compute/cuda/11.3.1/local_installers/cuda_11.3.1_465.19.01_linux.run
sudo sh cuda_11.3.1_465.19.01_linux.run
OR
If the instruction above doesn’t work then do below.
1
2
3
4
5
6
7
8
# deb(local)
wget https://developer.download.nvidia.com/compute/cuda/repos/ubuntu2004/x86_64/cuda-ubuntu2004.pin
sudo mv cuda-ubuntu2004.pin /etc/apt/preferences.d/cuda-repository-pin-600
wget https://developer.download.nvidia.com/compute/cuda/11.3.1/local_installers/cuda-repo-ubuntu2004-11-3-local_11.3.1-465.19.01-1_amd64.deb
sudo dpkg -i cuda-repo-ubuntu2004-11-3-local_11.3.1-465.19.01-1_amd64.deb
sudo apt-key add /var/cuda-repo-ubuntu2004-11-3-local/7fa2af80.pub
sudo apt-get update
sudo apt-get -y install cuda
2) Install the CUDA Toolkit 11.3
(1) Run sudo sh cuda_11.3.1_465.19.01_linux.run
After downloading cuda linux .run file using wget, we need to run the .run file using sh command.
Run the command above. Make sure you are at the same directory as you run the wget command.
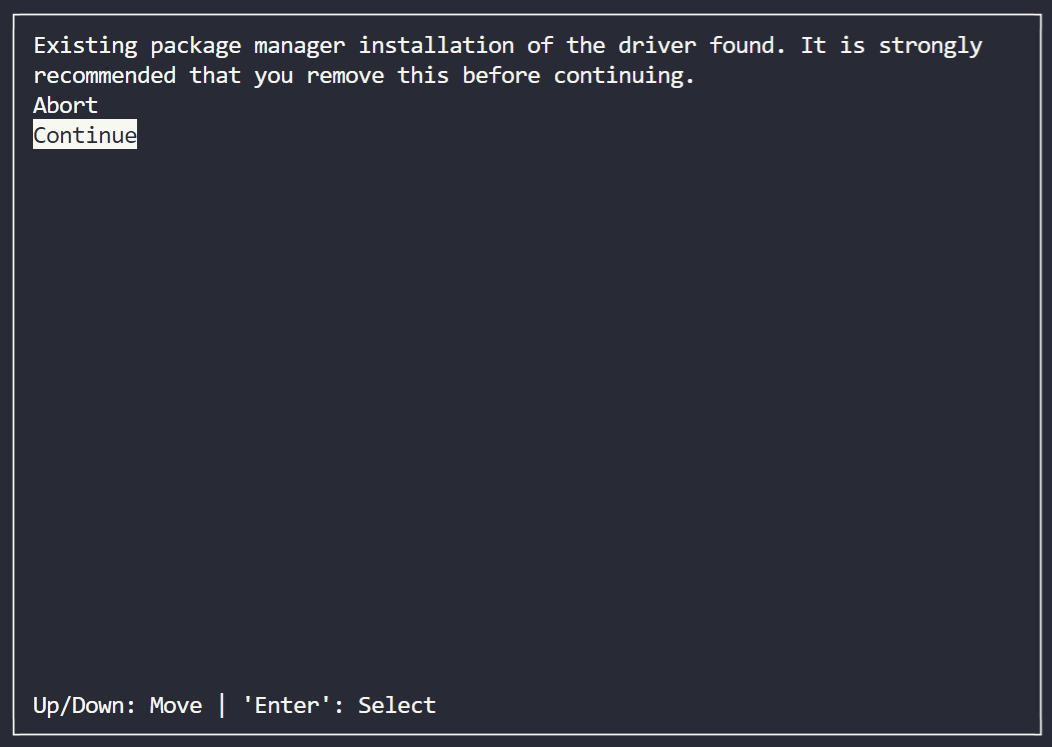 Move to ‘Continue’ and select with ENTER.
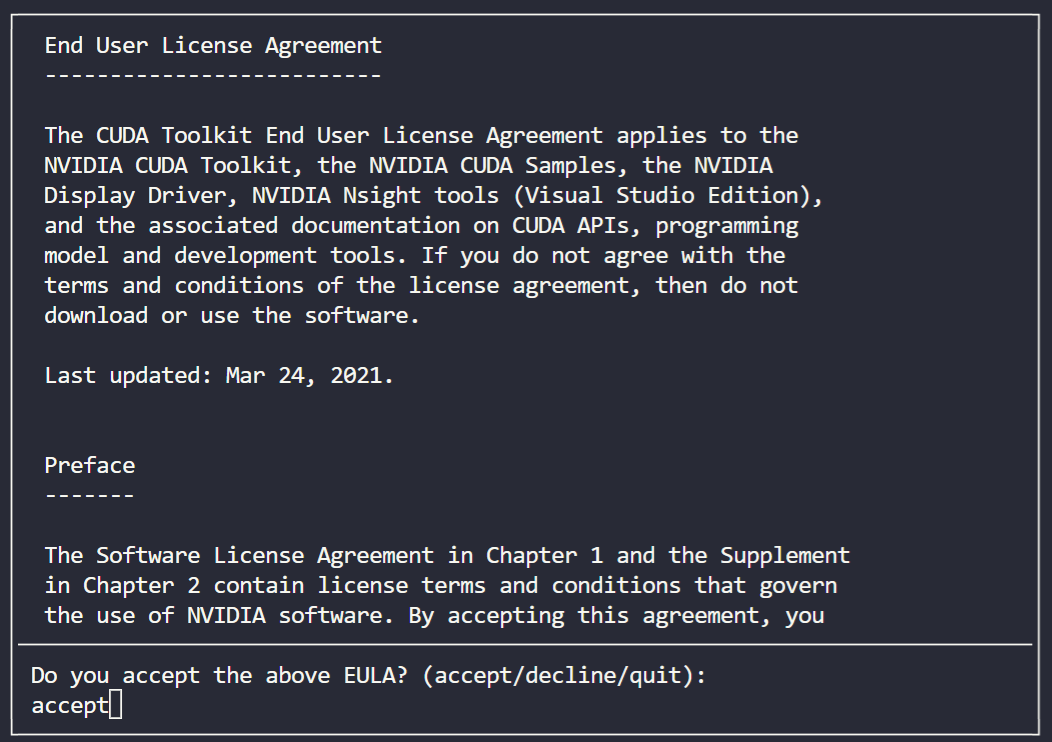 Type ‘accept’ and press ENTER.
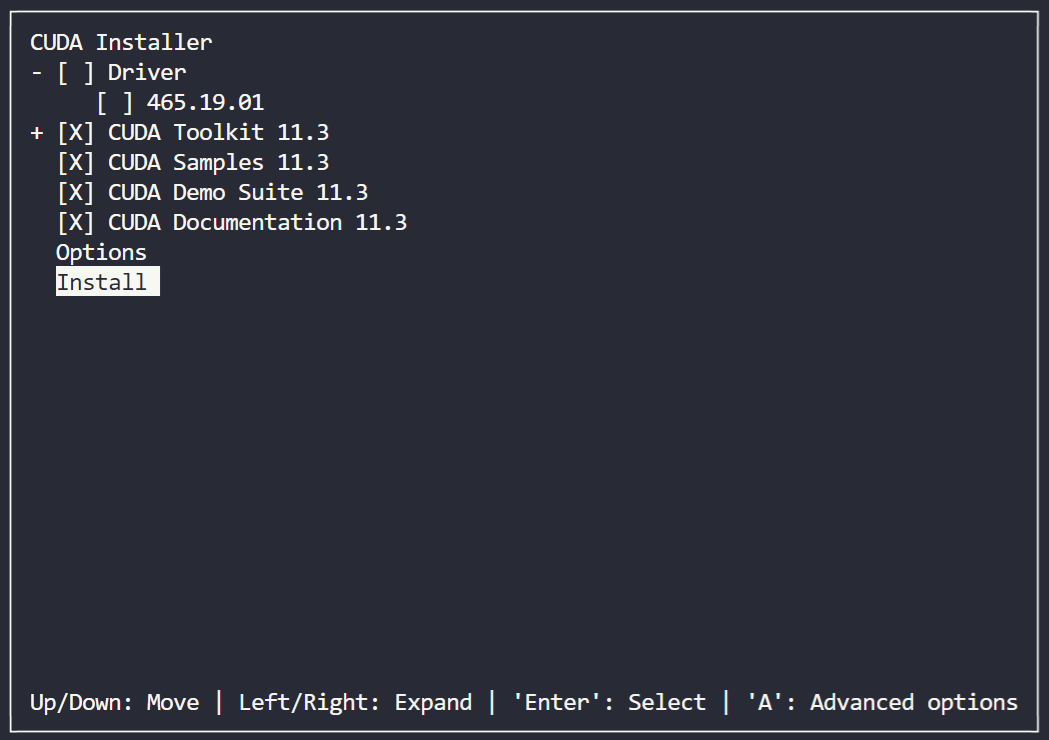 Press ENTER on ‘Driver’ to dismiss it and select ‘Install’
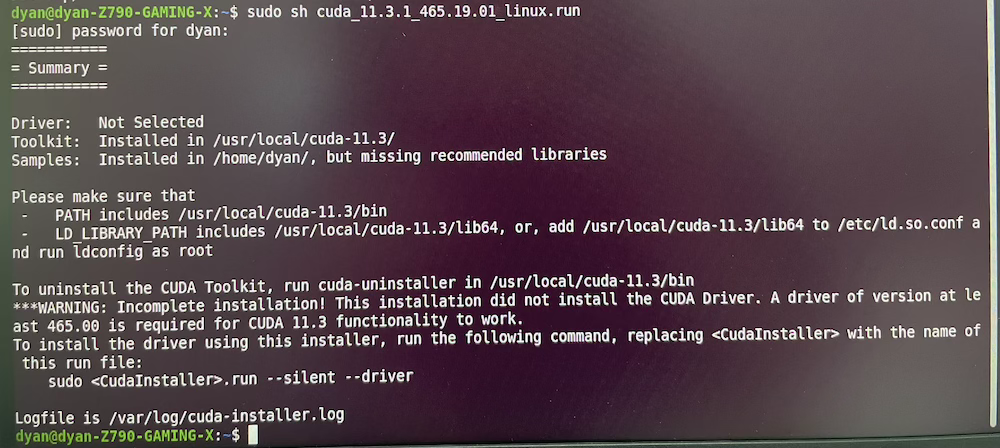 It will look like this when the installation went well! 🎊
(2) gcc error
👸 If the problem occurs because of the absence of gcc…
1
2
3
4
sudo apt update
sudo apt install build-essential
sudo apt-get install manpages-dev
gcc --version
gcc (Ubuntu 9.4.0-1ubuntu1~20.04.2) 9.4.0
Copyright (C) 2019 Free Software Foundation, Inc.
This is free software; see the source for copying conditions. There is NO
warranty; not even for MERCHANTABILITY or FITNESS FOR A PARTICULAR PURPOSE.
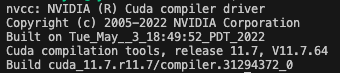
(3) Check CUDA version
1
nvcc -V
- If
nvcccommand is not found and error occurs…- Run
sudo apt install nvidia-cuda-toolkit
- Run
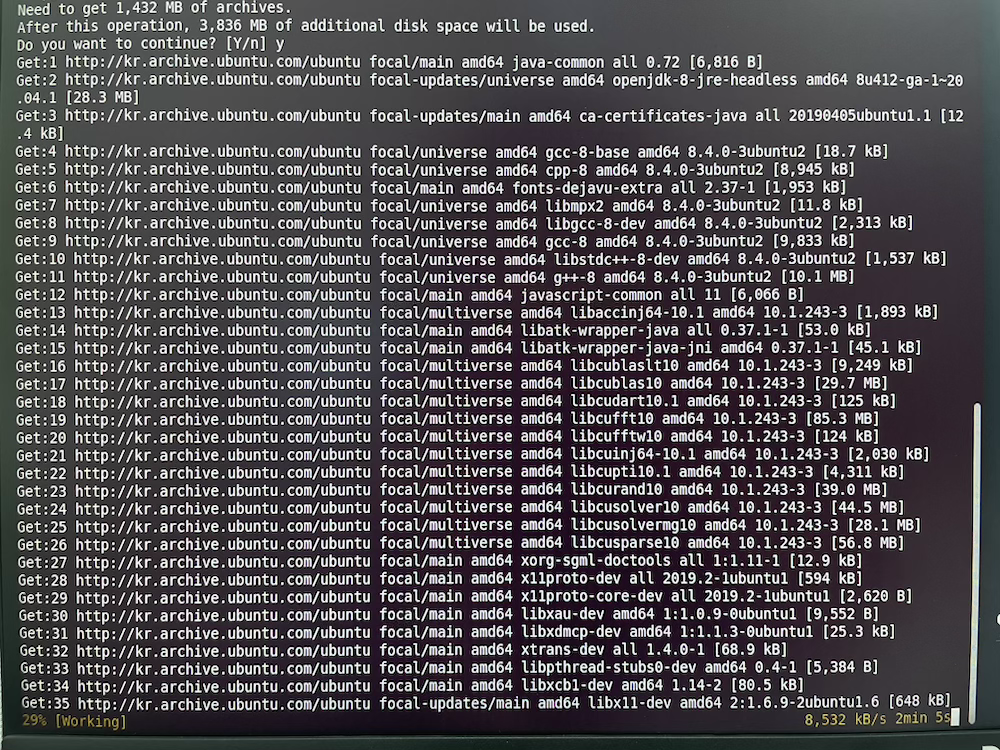 Command sudo apt install nvidia-cuda-toolkit is running!
- No /usr/local/cuda-{version} directory after CUDA installation
1
sudo ln -s /usr /usr/local/cuda-{version}
(4) Add CUDA Toolkit settings to environment variables
1
2
3
4
sudo sh -c "echo 'export PATH=$PATH:/usr/local/cuda-11.3/bin'>> /etc/profile"
sudo sh -c "echo 'export LD_LIBRARY_PATH=$LD_LIBRARY_PATH:/usr/local/cuda-11.3/lib64'>> /etc/profile"
sudo sh -c "echo 'export CUDARDIR=/usr/local/cuda-11.3'>> /etc/profile"
source /etc/profile
5. Install cuDNN
1) Download and install cuDNN
Go to the website above in order to install cuDNN Archive in order to specify the cuDNN version.
An NVIDIA account is required, so if you do not have one, you will need to sign up beforehand. After log in to NVIDIA DEVELOPER website, download as indicated in below.
(1) To install cnDNN 9.x.x versions
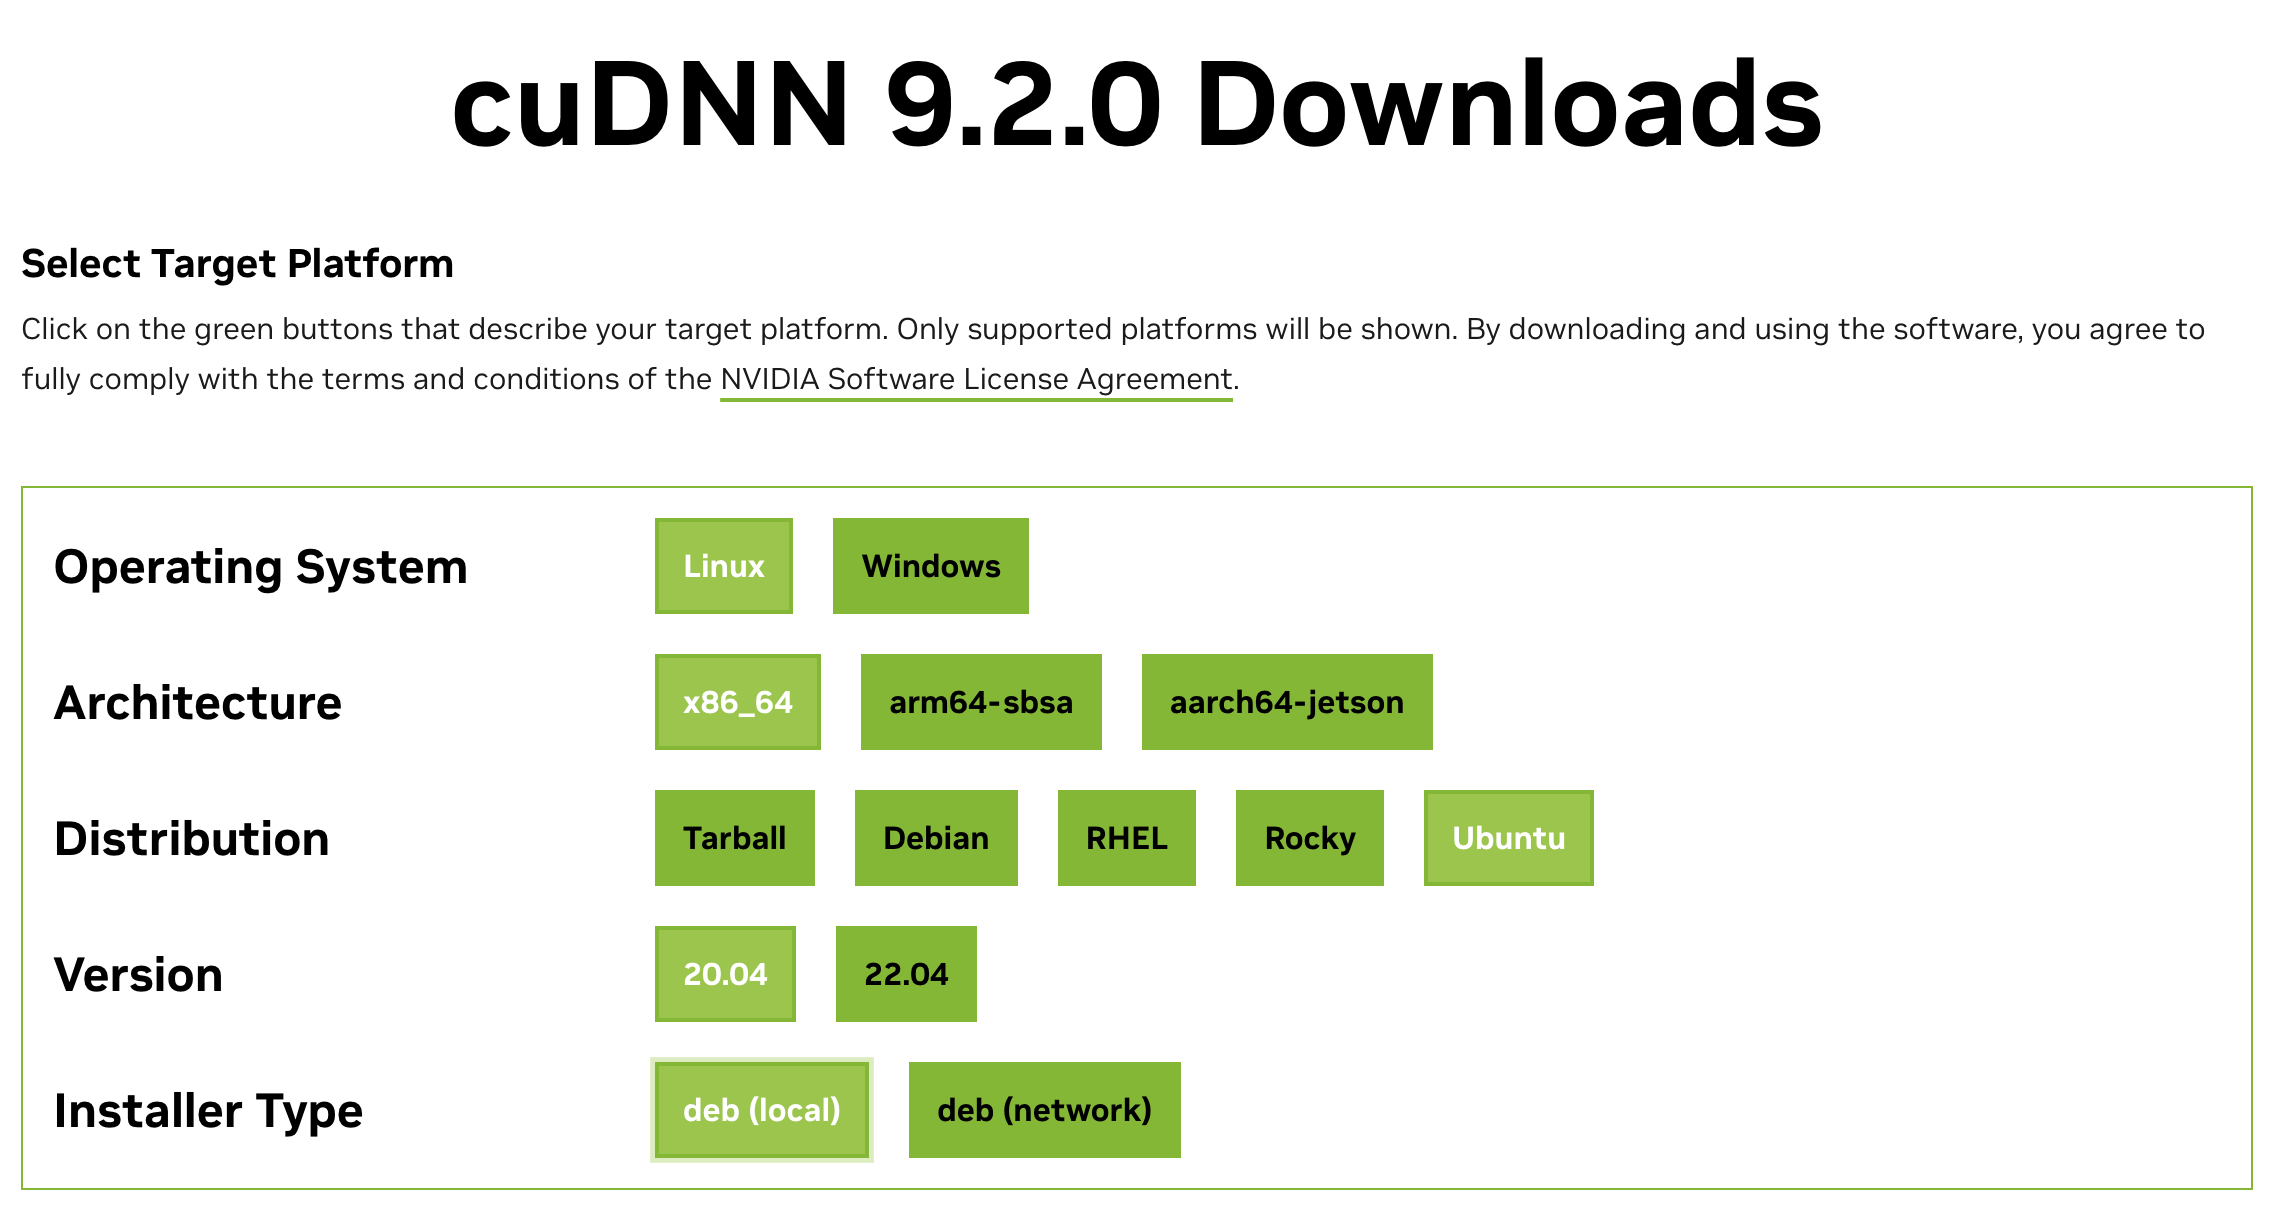
cuDNN 9.2.0 Downloads > Operating System ‘Linux’ > Architecture ‘x86_64’ > Distribution ‘Ubuntu’ > Version ‘20.04’ > Installer Type ‘deb(local)’ > Follow the instruction
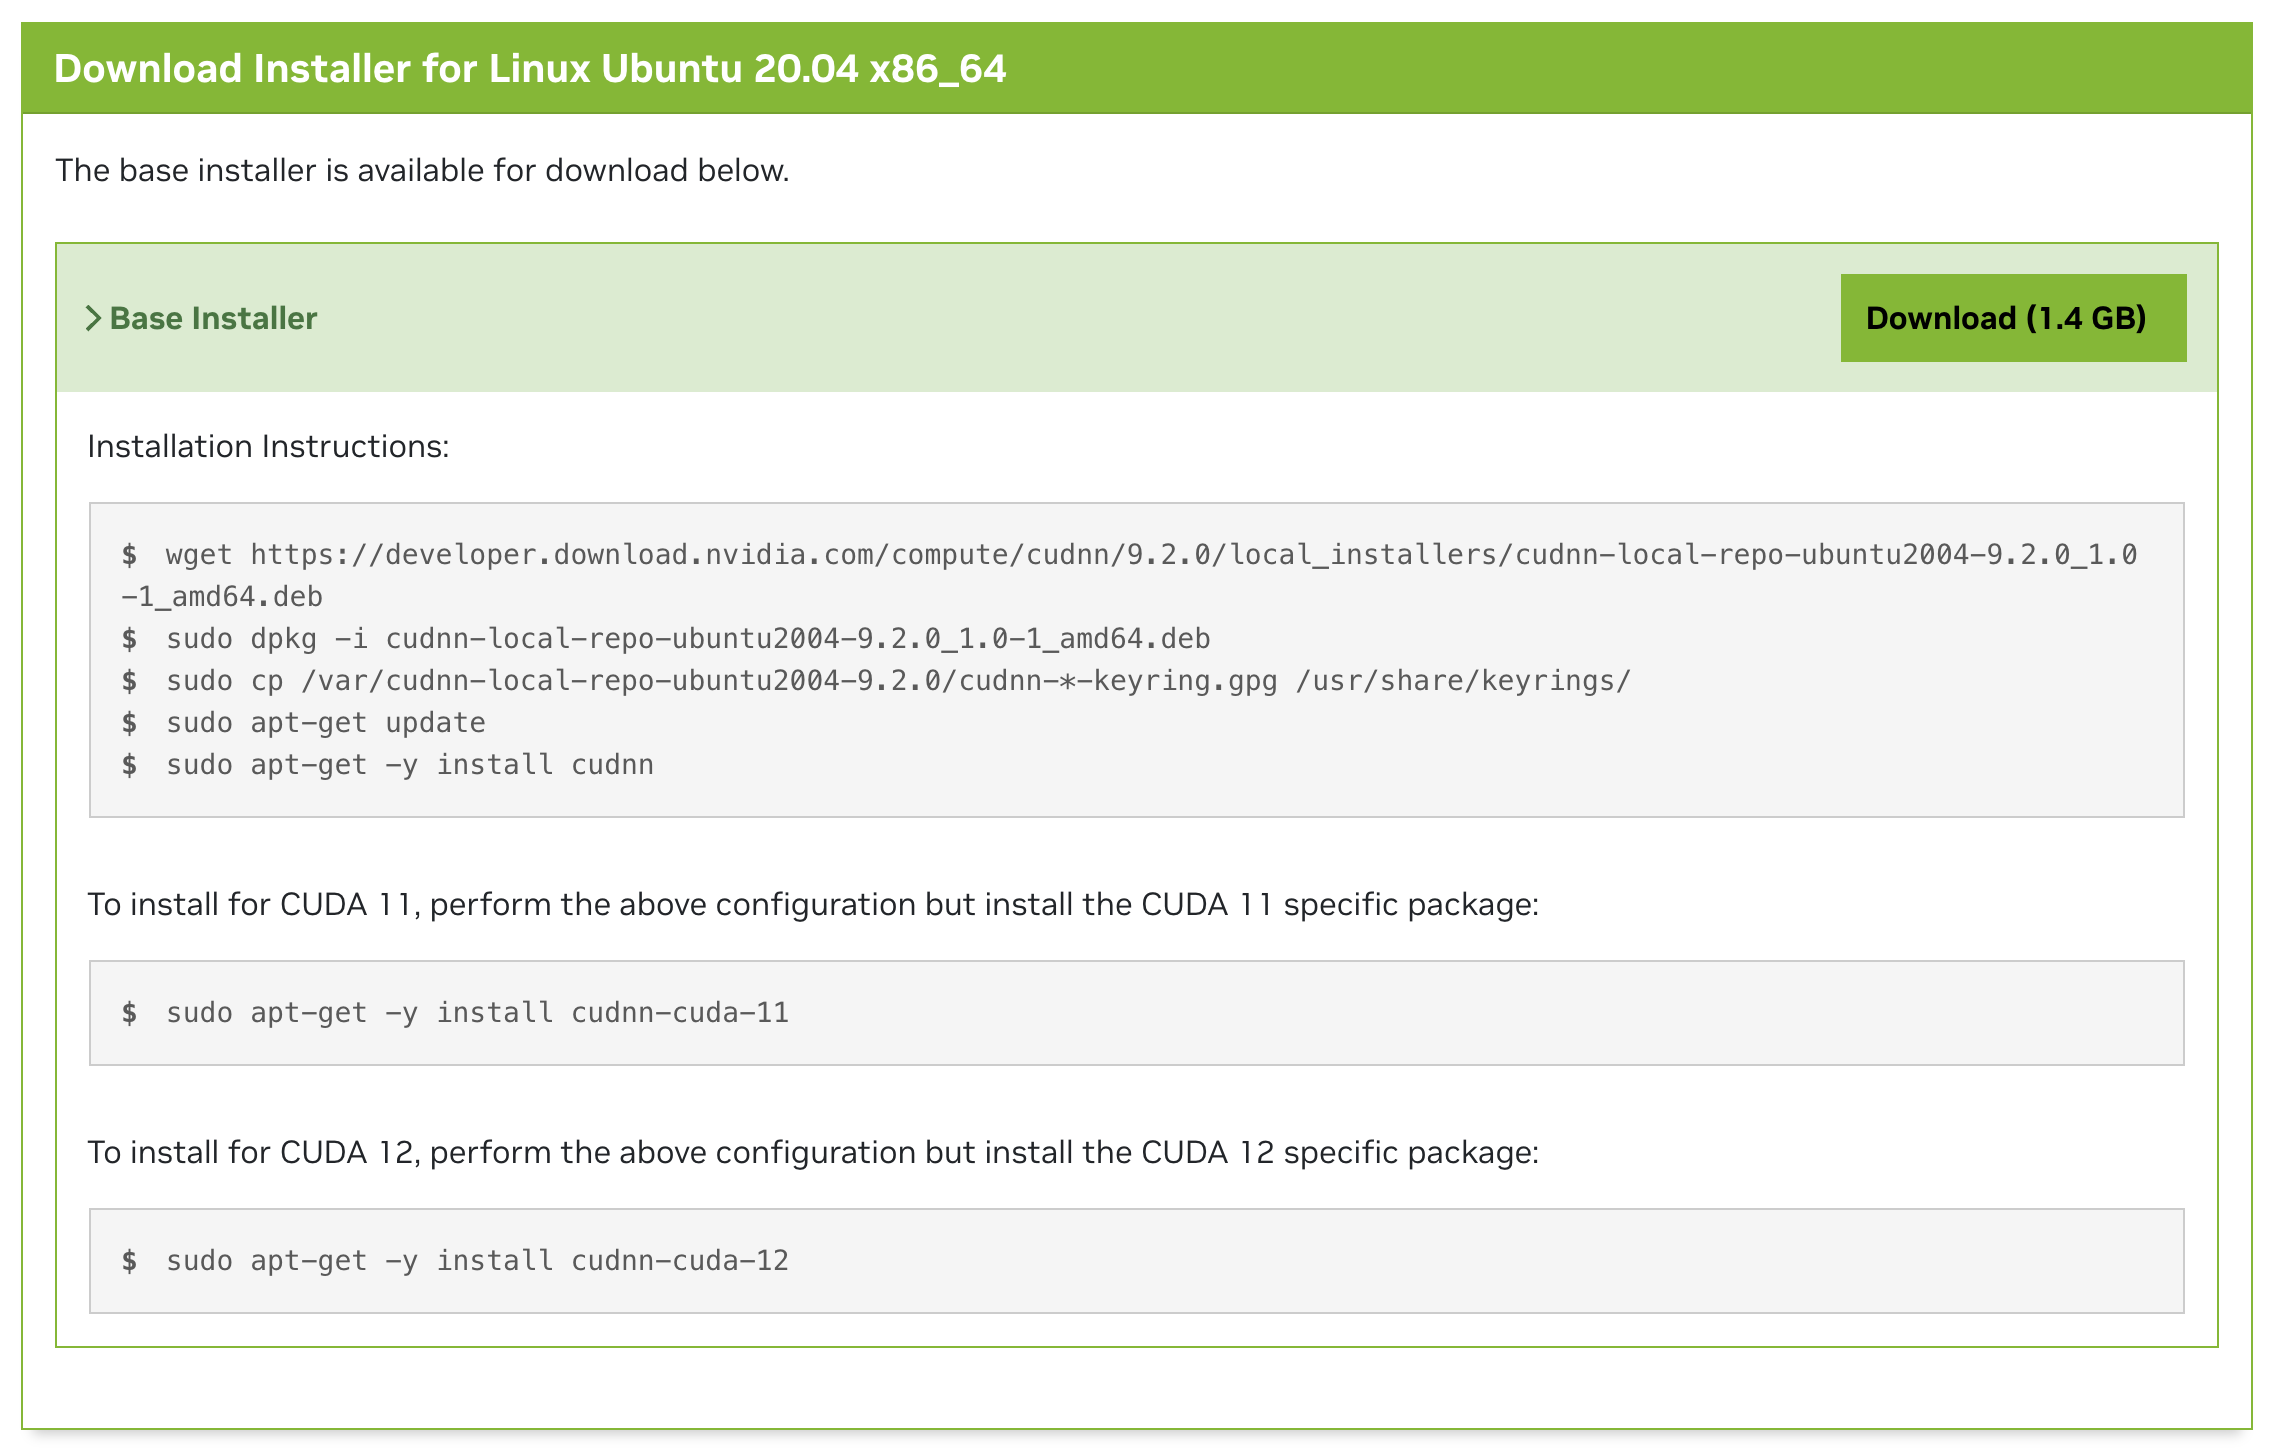 Press the ‘Download (1.4 GB)’ button.
If the download is done, run command below.
1
2
3
4
5
wget https://developer.download.nvidia.com/compute/cudnn/9.2.0/local_installers/cudnn-local-repo-ubuntu2004-9.2.0_1.0-1_amd64.deb
sudo dpkg -i cudnn-local-repo-ubuntu2004-9.2.0_1.0-1_amd64.deb
sudo cp /var/cudnn-local-repo-ubuntu2004-9.2.0/cudnn-*-keyring.gpg /usr/share/keyrings/
sudo apt-get update
sudo apt-get -y install cudnn-cuda-11
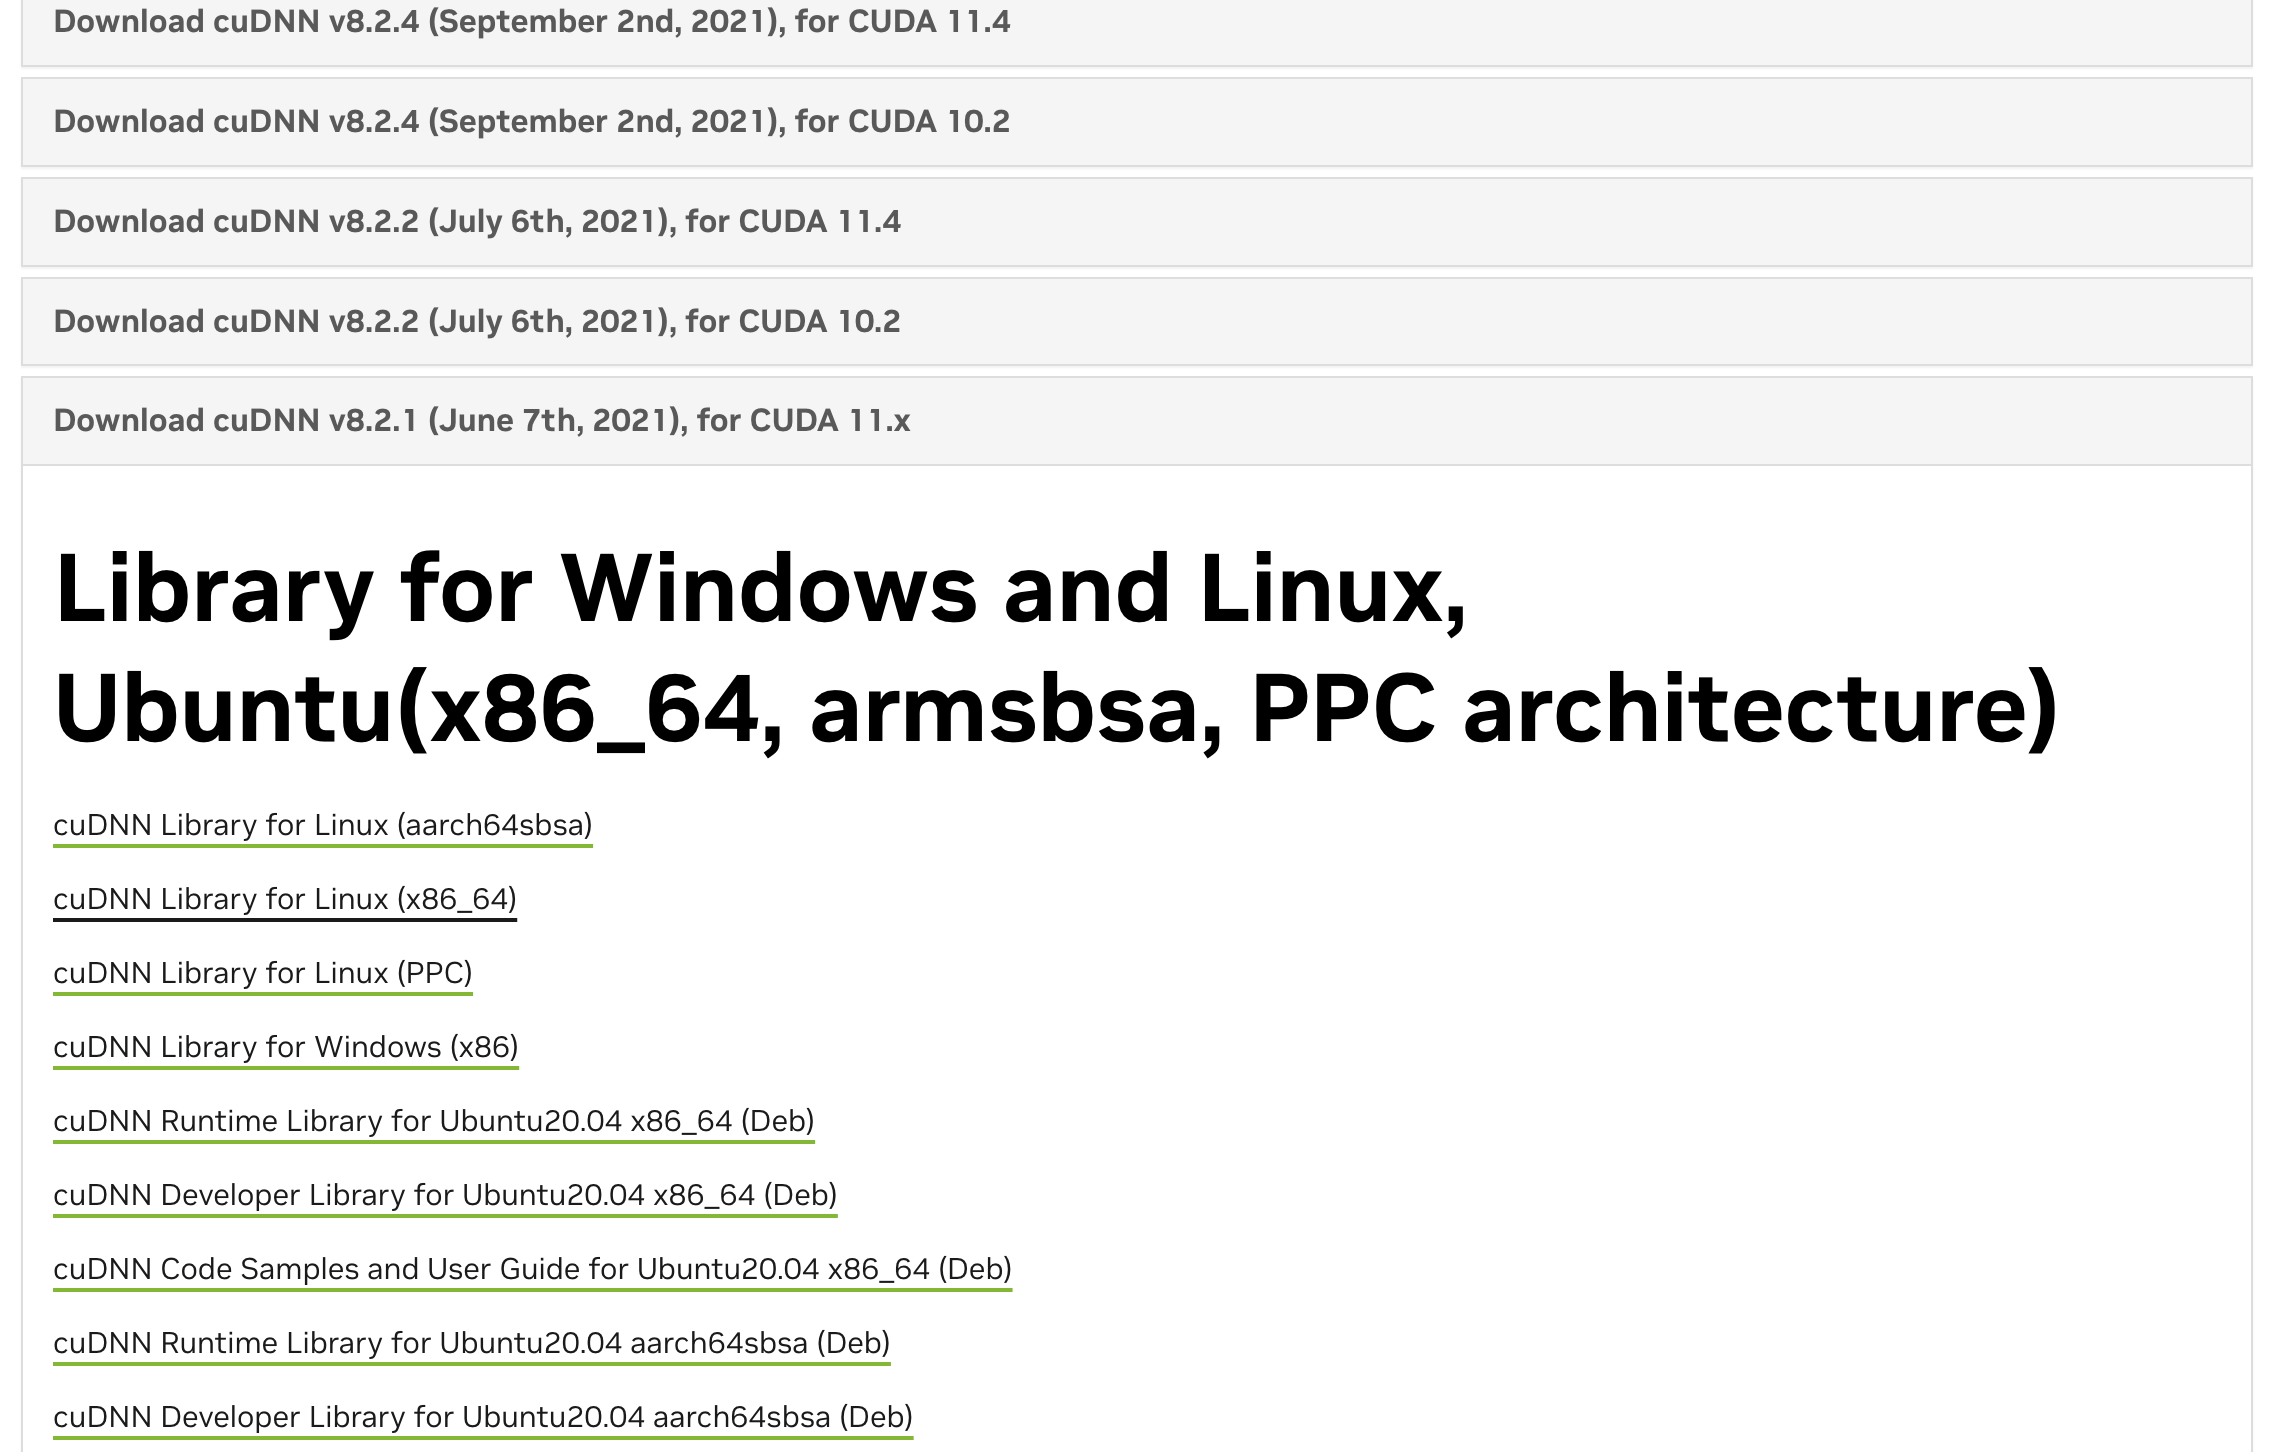
(2) To install cnDNN 8.x.x ~ 1.x.x versions (in this case v8.2.1) ⭐
Follow the instruction below! 🚶♀️
cuDNN 8.x - 1.x (December 2023 - August 2014) > Download cuDNN v8.2.1 (June 7th, 2021), for CUDA 11.x > cuDNN Library for Linux (x86_64)
2) Unzip the downloaded file and check the setting
- Copy command
1
cp {directory_or_file_to_copy} {directory_or_file_to_paste}
- Decompression command
1
tar xvzf {compressed_filename}
means all inclusive
RUN
1
2
3
4
5
6
7
8
9
10
11
12
13
tar xvzf cudnn-11.3-linux-x64-v8.2.1.32.tgz

sudo cp cuda/include/cudnn* /usr/local/cuda/include
sudo cp cuda/lib64/libcudnn* /usr/local/cuda/lib64
sudo chmod a+r /usr/local/cuda/include/cudnn.h /usr/local/cuda/lib64/libcudnn*

sudo ln -sf /usr/local/cuda-11.3/targets/x86_64-linux/lib/libcudnn_adv_train.so.8.2.1 /usr/local/cuda-11.3/targets/x86_64-linux/lib/libcudnn_adv_train.so.8
sudo ln -sf /usr/local/cuda-11.3/targets/x86_64-linux/lib/libcudnn_ops_infer.so.8.2.1  /usr/local/cuda-11.3/targets/x86_64-linux/lib/libcudnn_ops_infer.so.8
sudo ln -sf /usr/local/cuda-11.3/targets/x86_64-linux/lib/libcudnn_cnn_train.so.8.2.1  /usr/local/cuda-11.3/targets/x86_64-linux/lib/libcudnn_cnn_train.so.8
sudo ln -sf /usr/local/cuda-11.3/targets/x86_64-linux/lib/libcudnn_adv_infer.so.8.2.1  /usr/local/cuda-11.3/targets/x86_64-linux/lib/libcudnn_adv_infer.so.8
sudo ln -sf /usr/local/cuda-11.3/targets/x86_64-linux/lib/libcudnn_ops_train.so.8.2.1  /usr/local/cuda-11.3/targets/x86_64-linux/lib/libcudnn_ops_train.so.8
sudo ln -sf /usr/local/cuda-11.3/targets/x86_64-linux/lib/libcudnn_cnn_infer.so.8.2.1 /usr/local/cuda-11.3/targets/x86_64-linux/lib/libcudnn_cnn_infer.so.8
sudo ln -sf /usr/local/cuda-11.3/targets/x86_64-linux/lib/libcudnn.so.8.2.1 /usr/local/cuda-11.3/targets/x86_64-linux/lib/libcudnn.so.8
- Make sure
Make sure the system can find newly added libraries and check if the setting is perfectly done.
1
2
sudo ldconfig
ldconfig -N -v $(sed 's/:/ /' <<< $LD_LIBRARY_PATH) 2>/dev/null | grep libcudnn

3) Validation!!
1
2
3
4
5
6
7
8
9
10
11
12
13
14
#!/bin/bash

# libraries for examples
sudo apt-get install libfreeimage3 libfreeimage-dev

cp -r /usr/src/cudnn_samples_v8/ $HOME

cd  $HOME/cudnn_samples_v8/mnistCUDNN

make clean && make

./mnistCUDNN

# Test passed!
6. Anaconda on Ubuntu 20.04 🐍
1) Download and install Anaconda
Follow the steps to install the Anaconda distribution on the Ubuntu system. They are explained in detail below:
Step 1. Visit Anaconda website
Visit the official website of Anaconda distribution and download the latest version of Anaconda distribution installer for Ubuntu.
Step 2. Send an email
Provide an email to download Distribution of Anaconda.
 Type in your email address to get the Distribution for Anaconda. 🐍
Step 3. Check an email
Go to your inbox and check if there is an email from account@anaconda.cloud.
If you see the link to download Anaconda and Conda packages, clik the ‘Download Now’ button!
 This is what you will see on the email! 📧
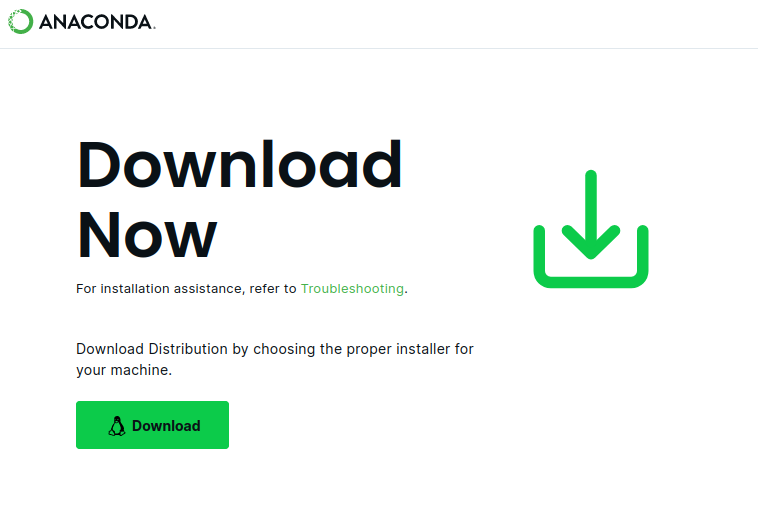 If you click ‘Download Now’ button from above, this link will be opened.
If you click the button, downlo ad will be proceeded automatically!
Step 4. Open the terminal and run the installer
Go to the ~/Download directory and open the terminal with Ctrl+Alt+T or you can use the right-click on your mouse from the directory from the Files application. (You will see Open in Terminal)
Then run the Anaconda installer by executing the following command.
1
bash Anaconda3-2024.02-1-Linux-x86_64.sh
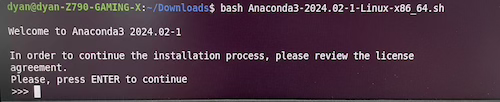 Press ENTER for once and press Space bar till you see Chapter 15.12! ⏭️
Press ENTER button once if you see the outcome like above then the license agreement will show up.
Then press space bar repeatedly to review the license agreement until you see Chapter “15.12 ENTIRE AFREEMENT.”.
Then yo will see as below:
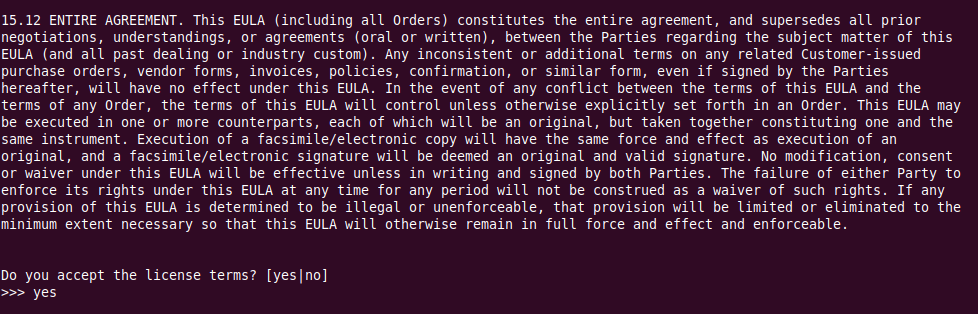 Type ‘yes’ to continue… 🆗
Step 5. Specify the installation location
After accepting the license agreement, the installer will ask for the installation folder for Anaconda distribution. You can press ‘Enter’ to install in the default location or you can specify your desired location. Then installer will start unpacking packages and install them. Installation may take some time.
 Check the Anaconda location and press ENTER to confirm the location! ☑️
Step 6. Initialize Anaconda
After installing Anaconda, the installer will ask the user to initialize the conda.
Since it was installed with sudo, it asks whether to configure conda init for root.
If you want to initialize the conda environment even as root, type “yes” to initialize Anaconda and finish installation.
It will add the ‘conda’ tool to the system path, so users can run it from any directory.
If this part is no longer needed, find >>> conda initailize >>> at the end of /root/.bashrc and remove it!
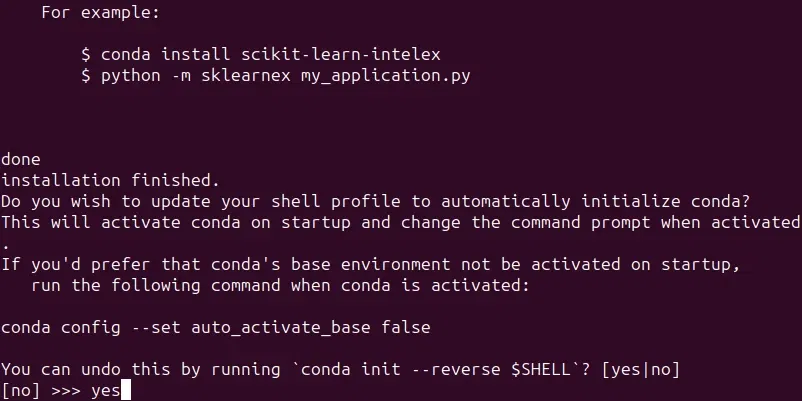 Type ‘yes’ and press ENTER
Now installation is complete and to activate Anaconda, just close the terminal and reopen it.
1
(base) dyan@dyan-Z790-GAMING-X:~/Downloads$
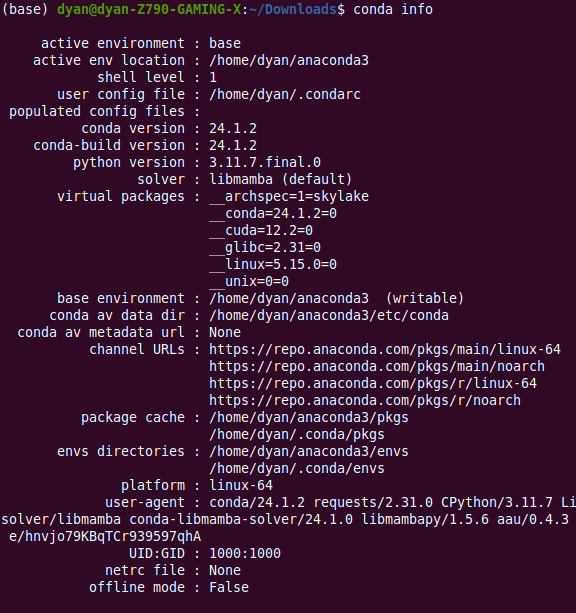
2) Check conda version
Run ‘conda info’ in the new terminal to verify that the Anaconda distribution is installed properly. It will display the details of installation if it is installed successfully.
1
conda info
3) Updating Anaconda
It is very important to keep the Anaconda updated to the latest version.
Step 1: Run conda update command
Run the following command in the terminal.
1
conda update --all
Step 2: Confirm updates
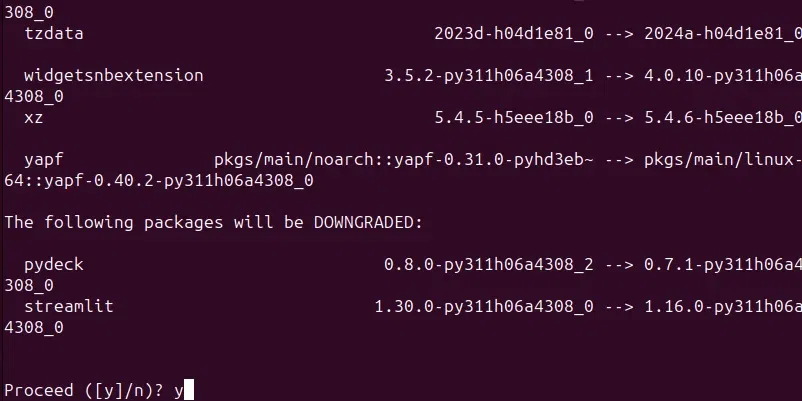 Type ‘yes’ and press ‘ENTER’ to update Anaconda.
4) conda initialization and auto activation
conda init adds the process of initializing conda to /home/{user}/.bashrc.
1
2
3
source /usr/anaconda3/bin/activate
conda init
source ~/.bashrc
conda environment auto activation can be controlled using the following command.
1
2
3
4
5
# Automatically activate conda environment (initial setup)
conda config --set auto_activate_base True

# Disable automatic activation of conda environment
conda config --set auto_activate_base False
5) Create new env
Create new conda environment for each of your projects! ♻️
1
conda create -n {env_name}
You also can specify the python version as below:
1
conda create --name {env_name} python=3.8.19
👸 I’d recommend that you create a dedicated
condaenvironment for each project! 👍
6) Activate and deactivate
1
2
3
4
5
6
7
# When you activate the env you created from above
dyan@dyan-Z790-GAMING-X:~/$ conda activate {env_name}
({env_name}) dyan@dyan-Z790-GAMING-X:~/$

# When you deactivate the env you created from above
({env_name}) dyan@dyan-Z790-GAMING-X:~/$ conda deactivate
dyan@dyan-Z790-GAMING-X:~/$
7) Clone existing conda env
1
conda create -n {env_name} --clone {existing_env_name}
8) Cleaning caches
If you repeatedly create various conda environments and install and delete conda packages, unnecessary package caches may accumulate in {anaconda installation location}/pkgs/ and capacity may become an issue.
1
2
3
du -h -s --apparent-size /home/dyan/anaconda3/pkgs/

# 5.3G   /home/dyan/anaconda3/pkgs/
Cleaning can be done using the conda command.
1
conda clean -p
If conda does not operate normally after conda package cleaning, add the -all option as shown below to remove all index cache, lock files, unused cache packages, and tarballs.
1
conda clean -all
7. Install Python packages
1) Install pip
1
sudo apt install python3-pip
👸 And then let’s activate
condaenv before we start to install python packages!
2) Install PYTORCH framework and it’s packages
→ v1.12.1 Linux and Windows (previous versions)
Conda
1
2
# CUDA 11.3
conda install pytorch==1.12.1 torchvision==0.13.1 torchaudio==0.12.1 cudatoolkit=11.3 -c pytorch
Wheel (Recommanded)
1
2
# CUDA 11.3
pip install torch==1.12.1+cu113 torchvision==0.13.1+cu113 torchaudio==0.12.1 --extra-index-url https://download.pytorch.org/whl/cu113
3) Torch-tensorRT
1
pip3 install torch-tensorrt -f https://github.com/NVIDIA/Torch-TensorRT/releases
4) More useful packages
1
2
3
4
5
6
conda install ipython matplotlib numpy tqdm pyyaml
pip install -U scikit-learn scipy albumentations
pip install wandb
pip install opencv-python
conda install -n fld ipykernel --update-deps --force-reinstall
pip install paramiko
👸 TBC… ⏩