Development Environments [2]: Ubuntu 20.04 Settings on RTX 4080 -3
Prerequisites
- Development-Environments-2-Ubuntu-20.04-Settings-on-RTX-4080-1
- Development-Environments-3-Ubuntu-20.04-Settings-on-RTX-4080-2
8. Check Information
1) Graphic Card
1
2
3
lspci | grep -i VGA
# or
nvidia-smi --query | fgrep 'Product Name'
NVIDIA GeForce RTX 4080
2) LSB (Linux Standard Base) and Distribution Information
1
lsb_release -a
No LSB modules are available.
Distributor ID: Ubuntu
Description: Ubuntu 20.04.6 LTS
Release: 20.04
Codename: focal
3) The amount of free and used memory
The -h option stands for “human-readable” and formats the output in a way that is easy to read by humans, using units like KiB (kibibytes), MiB (mebibytes), GiB (gibibytes), etc.
1
free -h

4) GCC Complier
1
2
sudo apt install build-essential
gcc --version
gcc (Ubuntu 9.4.0-1ubuntu1~20.04.2) 9.4.0
Copyright (C) 2019 Free Software Foundation, Inc.
This is free software; see the source for copying conditions. There is NO
warranty; not even for MERCHANTABILITY or FITNESS FOR A PARTICULAR PURPOSE.
1) Install HDD and listing all part
- Install Hard Disk on your desktop.
- Turn on the PC and run command below to check if the install
1
sudo fdisk -l
- Identifying one to mount
Disk /dev/sda: 3.65 TiB, 4000787030016 bytes, 7814037168 sectorsDisk model: ST4000DM004-2U91
Units: sectors of 1 * 512 = 512 bytes
Sector size (logical/physical): 512 bytes / 4096 bytes
I/O size (minimum/optimal): 4096 bytes / 4096 bytes
Disklabel type: gpt
Disk identifier: 1E186808-864F-4859-BF2A-4A0F5C41347FDevice Start End Sectors Size Type
/dev/sda1 2048 7814035455 7814033408 3.7T Linux filesystem
/dev/sda: original HDD address from ‘Disks’ program- The size of this disk is 3.6 TiB (4000787030016 bytes).
- DOS partition table format cannot be used on drives for volumes larger than 2199023255040 bytes (about 2TB) for 512-byte sectors.
- We need to use GUID partition table (GPT) format.
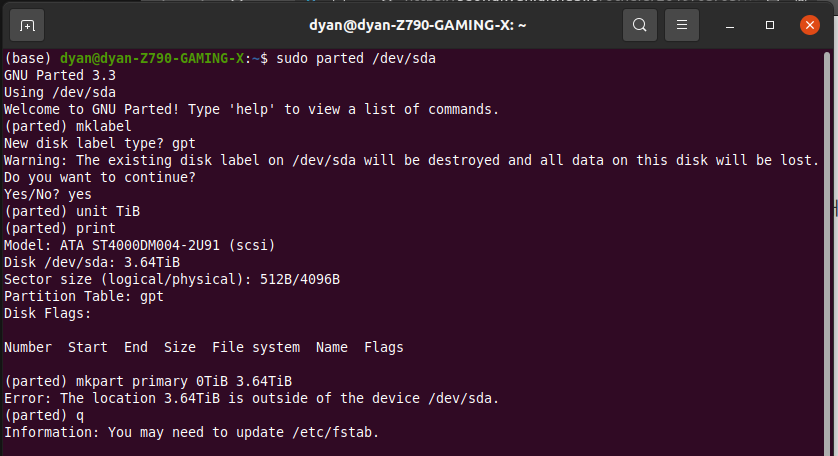
2-1) When HDD capacity is over 2TB
- Type command below on terminal.
1
sudo parted /dev/sda
- Type
mklabeland then typegpt - A message will be displayed stating that all internal data will be destroyed.
- Type
yesand press Enter to confirm creating the GPT partition table.
- Type
- Type
unit TiBto change the unit - Type
printto check the capacity - Type
mkpart primary 0TiB 3.64TiB(Change the capacity to yours🙂) - Type
qto quit
2-2) When HDD capacity is less than 2TB
- Type command below.
1
sudo fdisk /dev/sda
- Follow the instruction below
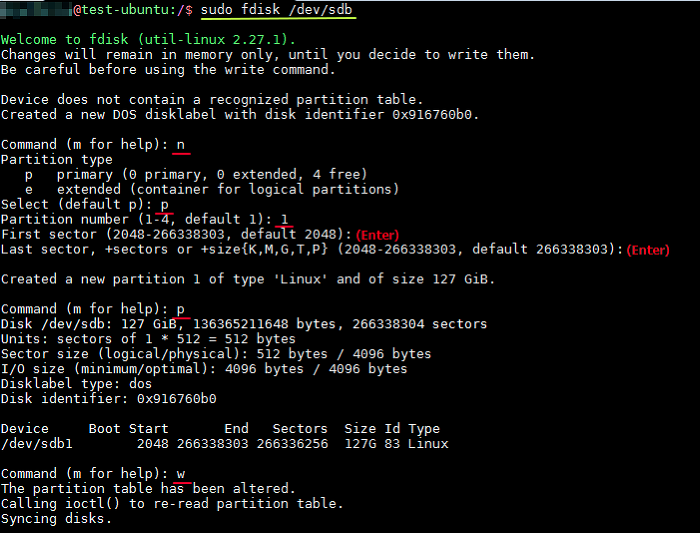 https://psychoria.tistory.com/521
3) Format the partition
- Type command below
1
sudo mkfs.ext4 /dev/sda
- You can ignore the part where you need to enter some informations by pressing ENTER.
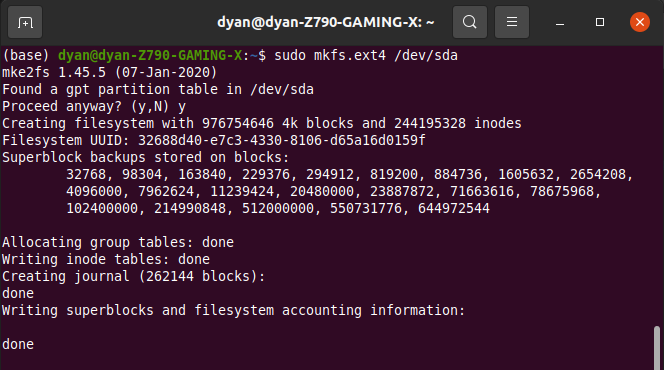 Formatting the partition
4) Mount
- Create directory to mount the external hard disk using follwing command.
1
sudo mkdir /mnt/sda
- Run the below
mountcommand to mount the partition to your mount point directory.
1
sudo mount /dev/sda /mnt/sda
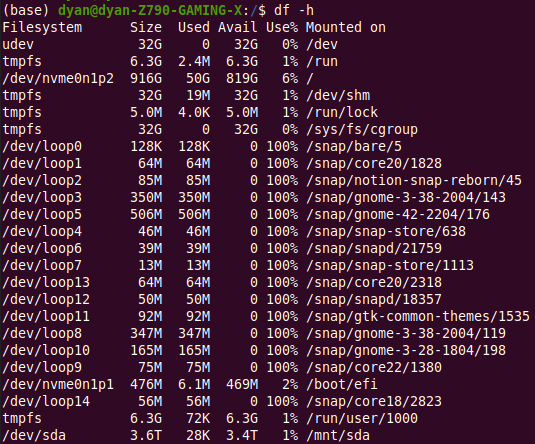
- Run the
dfcommand below to view all the mounted file systems
1
df -h
5) Configuring Auto-Mounting Partitions
Add mount information and set the automatic mount for every booting.
1
sudo vi /etc/fstab
- Add command below at the end.
1
/dev/sda /mnt/sda ext4 defaults 0 0
6) Creating Symbolic Link for Mount Hard Disk
1
sudo ln -s /mnt/sda /home/dyan/sda
- Type
cd /mntand give a writing and reading authority usingsudo chmod 777 sda
10. Open SSH
You can remotely access the PC set as the server from the SSH client of another PC, if you install Open SSH server. Which is much convient development environment.
It was installed in Ubuntu 20.04, but, it is the same in Ubuntu 22.04. 😉
0.Spec
Server PC : Ubuntu 20.04 LTS Desktop
Client PC : MacOS
1. Install Open SSH Server
Install Open SSH Server using the following command on terminal.
1
2
sudo apt update  # update repository
sudo apt install openssh-server
2. Check ssh execution status
1
sudo systemctl status ssh
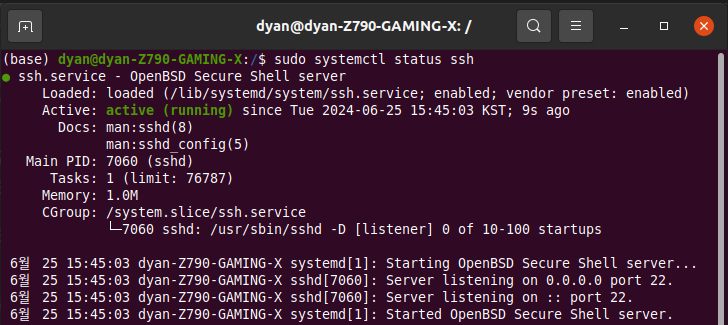
- If it is not active, run the following commands
1
2
sudo systemctl enable ssh
sudo systemctl start ssh
3. Activate Firewall
The firewall is disabled by default, and you can check its status with the following command.
1
sudo ufw status
If the firewall is active, allow ssh. If your firewall is disabled, you can ignore it.
1
sudo ufw allow ssh
4. Access from Client
Ubuntu has SSH Client installed by default.
If it is not installed, install it with the following command.
1
sudo apt-get install openssh-client
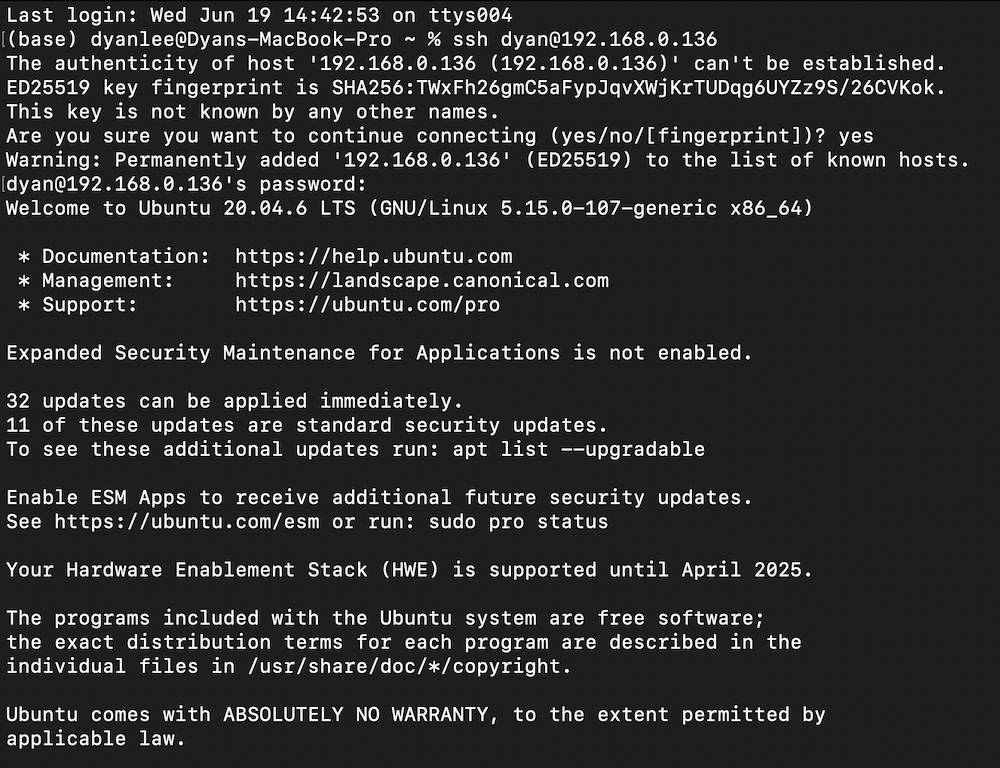
If SSH Client is installed, you can connect by entering the username and IP address from client PC as follows:
1
ssh {username}@{ip_address}
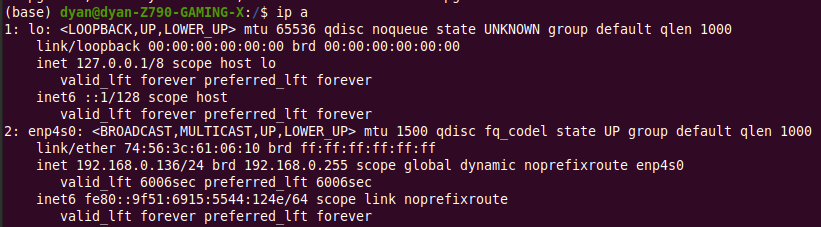
You can check IP address as follows:
1
ip a
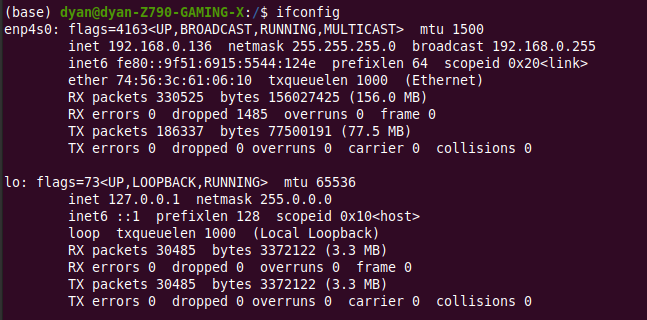
OR…
1
2
sudo apt install net-tools
ifconfig
5. Deactivate Firewall
You can stop ssh with the following command.
1
 sudo systemctl stop ssh
You can disable it from running during boot with the following command:
1
sudo systemctl disable ssh
Conversely, you can enable it to run during launch and boot with the following command:
1
2
sudo systemctl stop ssh
sudo systemctl enable ssh
11. Install Basics
1) Bluetooth
After updating apt database, We can install bluetooth using apt-get by running the following command:
1
2
3
4
sudo apt-get -y install bluetooth
sudo systemctl start bluetooth
sudo rfkill unblock bluetooth   # rfkill also requires sudo
sudo reboot
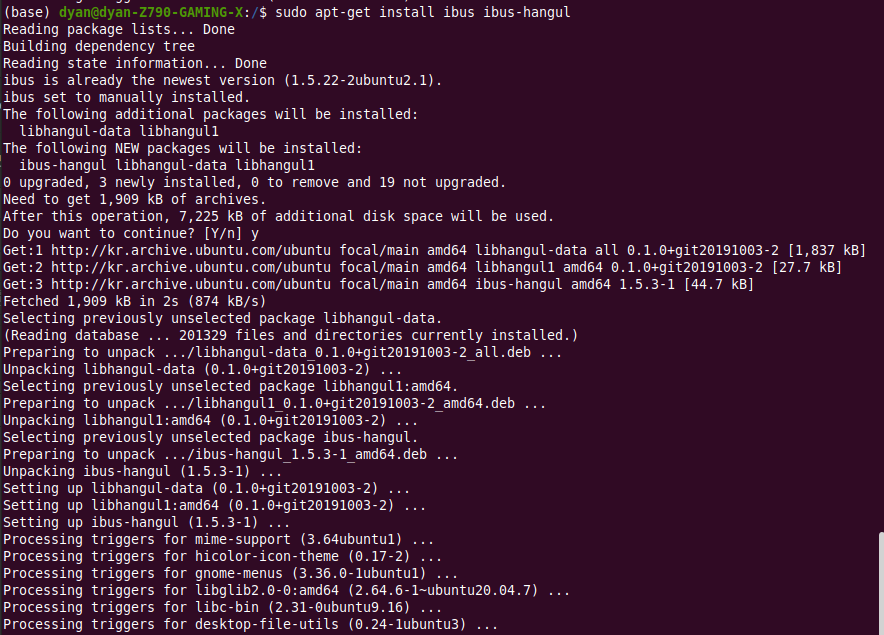
2) When Hangul doesn’t work
- Install and update
ibuspackage andibus-hangulpackage
1
2
3
sudo apt-get update
sudo apt-get upgrade
sudo apt-get install ibus ibus-hangul
- Go to
Settings>Region & Language> ClickManage Installed Languages
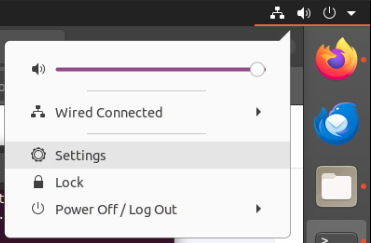 Go to Settings
 Go to Region & Language and click Manage Installed Languages.
- Install the language support when the Language Support window is opened.
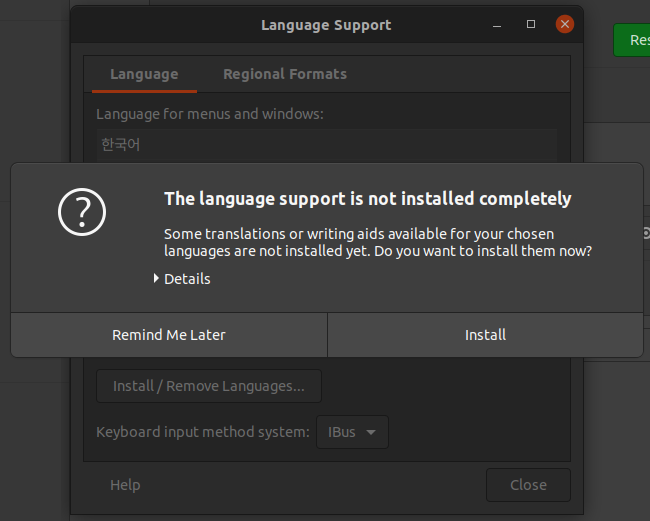 Install the language support.
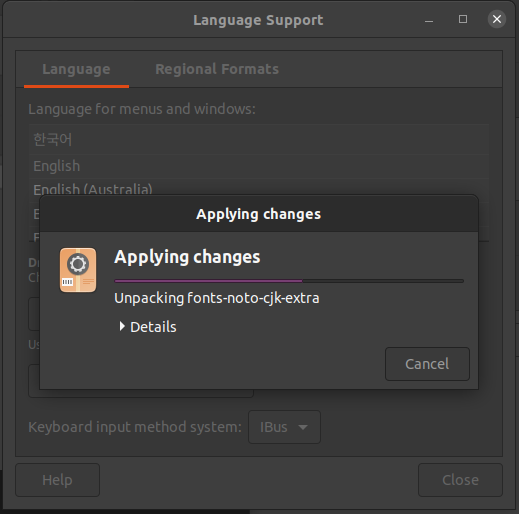 Installing and applying changes
- Select
fcitxfor Keyboard input method system.
 Select fcitx.
- Click
+button under Input Sources.
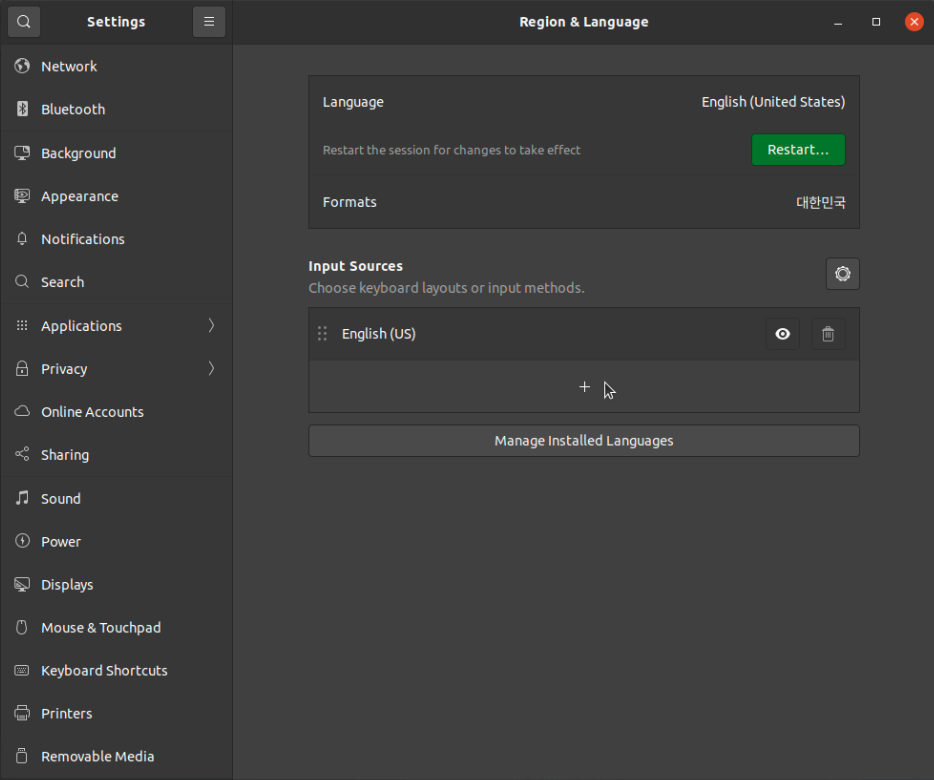 Add new input source.
- Choose
Korean(Hangul)!!!
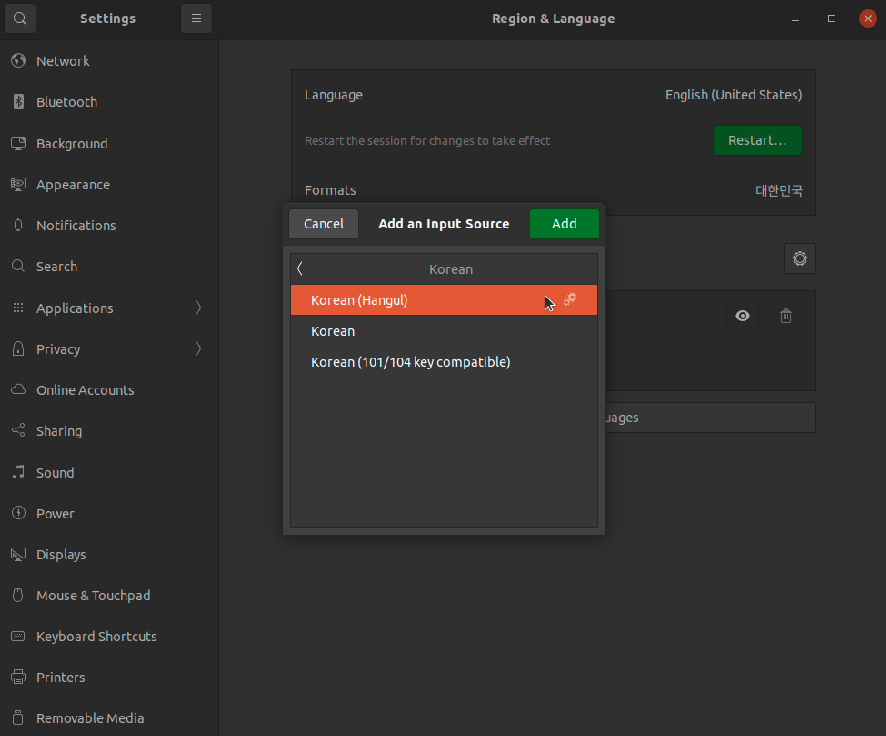
- Set the configurations with ‘Korean(Hangul)’ not ‘Korean’ !!! ⚠️
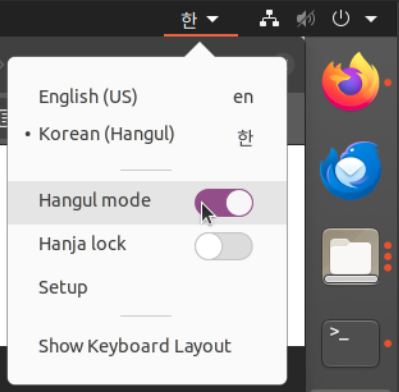
- Activate
Hangul modefrom the language setting from the top bar.
- Activate
 이제 한글 됩니다 😊
- Reboot after both installation and system setting.
- Press
Shift+spaceto change the language settings! 🚀
11. Install Useful programs
1) Useful programs
- VSCode, PuTTY, FileZilla, AnyDesk
- Microsoft Office, Teams, Outllook, Xpad
2) VSCode
- Install packages for VSCode
1
2
sudo apt update
sudo apt install software-properties-common apt-transport-https wget
- Get Microsoft GPG key from wget
1
wget -q https://packages.microsoft.com/keys/microsoft.asc -O- | sudo apt-key add -
- Add VSCode repository
1
sudo add-apt-repository "deb [arch=amd64] https://packages.microsoft.com/repos/vscode stable main"
- Install VSCode
1
sudo apt install code
- Run VSCode
1
code
2) KakaoTalk → don’t
3) Notion
Open terminal and execute the next commands:
1
2
3
4
echo "deb [trusted=yes] https://apt.fury.io/notion-repackaged/ /" | sudo tee /etc/apt/sources.list.d/notion-repackaged.list
sudo apt update
sudo apt install notion-app-enhanced
sudo snap install notion-snap-reborn
OR
Install notion-snap-reborn on Ubuntu